Overview of Maryland Homeowners Association Act (Title 11B)
The Maryland Homeowners Association Act (Title 11B) governs community‑wide rules, financial obligations, and disclosure duties. It requires HOA documents, including PDFs, to be provided to buyers before closing, ensuring transparency and compliance. 2026. MD!
Purpose and Scope of the Act
The Maryland Homeowners Association Act, codified in Title 11B of the Maryland Code, establishes a statutory framework that governs the creation, operation, and dissolution of homeowners associations (HOAs) across the state. Its primary purpose is to protect the rights and interests of individual homeowners while ensuring that the collective responsibilities of a community—such as maintenance of common areas, enforcement of covenants, and collection of assessments—are managed in a transparent, equitable, and legally compliant manner. The scope of the Act extends to all residential subdivisions that have adopted a declaration of covenants, conditions, and restrictions (CC&Rs) and have elected to operate under the HOA model. The Act also sets forth procedures for the collection of assessments, the handling of delinquent accounts, and the enforcement of covenants, creating a balanced system that supports homeowner autonomy and community well‑beings. In essence, the Maryland Homeowners Association Act serves as the legal backbone that aligns the interests of homeowners, board members, and developers, fostering stability, accountability, and long‑term value within Maryland’s residential communities. The Act allows homeowners to challenge assessments via a fair dispute process
Key Definitions and Terminology
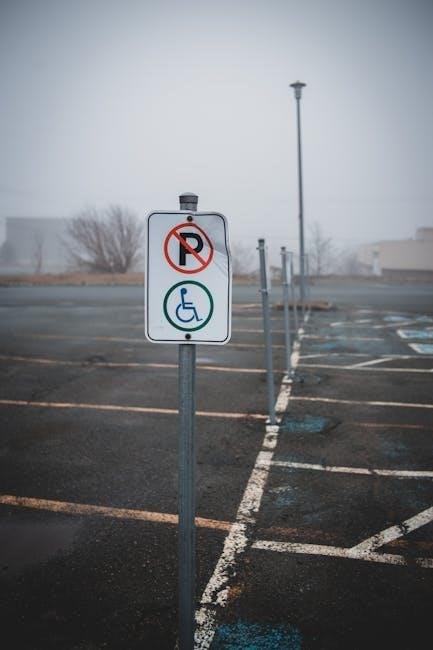
In the Maryland Homeowners Association Act (Title 11B), several terms are defined to clarify responsibilities and legal rights. A Homeowner is any person who owns a lot or unit within a subdivision governed by a homeowners association. The Association refers to the collective body of all homeowners, which may be organized as a corporation or a limited liability company. The Board is the elected governing body that administers the Association’s affairs, including enforcement of covenants and collection of assessments. An Assessment is a monetary charge levied on homeowners for the maintenance of common areas, insurance, and other community expenses. Common Area denotes land and structures owned by the Association and used by all homeowners, such as parks, roads, and shared amenities. The Declaration is the foundational document that establishes the Association, its powers, and the covenants, conditions, and restrictions (CC&Rs) that homeowners must follow. A Delinquent assessment is one that has not been paid by the due date, triggering potential collection actions. A Lien is a legal claim against a homeowner’s property for unpaid assessments, enforceable under state law. A Notice is a formal communication required by the Act when initiating collection or enforcement proceedings. A Meeting is any gathering of homeowners or board members to discuss Association matters, subject to quorum and notice requirements. Voting refers to the process by which homeowners or board members approve or reject proposals, subject to the thresholds set in the Declaration. A Subdivided Lot is a parcel that has been legally divided and recorded, affecting the rights and obligations of the homeowner. The term Subordination describes the legal relationship between the Association’s lien and other liens, ensuring that the Association’s lien is subordinate to certain mortgages. These definitions provide the legal framework that governs daily operations, dispute resolution, and the protection of homeowner interests under Title 11B. The Act also requires that all disclosure documents be delivered in PDF format to guarantee consistency and ease of access for homeowner.

Mandatory Disclosures and Documents
The Act mandates that sellers provide buyers with a PDF of the HOA’s governing documents, including the Declaration, CC&Rs, bylaws, and financial statements, before closing. This disclosure ensures transparency and protects buyers from hidden obligations. today.
Disclosure Requirements for Buyers
Under Title 11B, sellers must provide buyers with a PDF packet containing the community’s governing documents before closing. The packet includes the Declaration of Covenants, Conditions, and Restrictions (CC&Rs), HOA bylaws, the latest financial statements, the assessment schedule, and any special assessments adopted. Sellers must deliver the packet no later than the deed‑recording date, and buyers must receive it at least ten days before signing the purchase agreement. The PDF must preserve the original layout and be accessible on standard computer systems. Disclosures also require a written statement of the HOA’s current financial status, including delinquent assessments, pending litigation, and upcoming capital improvement projects. Buyers may review all documents and request clarification from the HOA. Failure to provide the required PDFs can lead to rescission of the sale or a claim for damages under the Act. The Act mandates that sellers disclose any known material defects or violations of the governing documents. All disclosures must be in English and signed by an authorized representative. Buyers must acknowledge receipt in writing. This process ensures transparency and protects buyers from hidden obligations or undisclosed financial burdens that could arise after closing. Now.!!!
Transmittal of HOA Documents (PDF Format)
Title 11B requires that the HOA deliver a PDF bundle of all governing documents to prospective buyers before the deed is recorded. The transmittal must include the Declaration, Bylaws, the most recent financial statements, the assessment schedule, and any special assessment notices. The PDF must be in a standard format that can be opened on any common operating system, and it must preserve the original layout and pagination. The HOA must send the PDF to the buyer’s attorney or the buyer’s agent no later than the closing date, and the buyer must receive it at least ten days prior to signing the purchase agreement. The transmittal must be signed by an authorized HOA officer and must contain the date of delivery. If the HOA fails to provide the PDF, the buyer may seek a rescission of the sale or a claim for damages under the Act. The Act also mandates that the HOA provide a written statement of any pending assessments or litigation. The PDF must be stored in the HOA’s records for at least three years after the sale. This requirement ensures transparency and protects buyers from undisclosed obligations; The transmittal process is a critical step in the Maryland Homeowners Association Act compliance framework. Compliance with these PDF transmittal rules not only satisfies legal mandates but also fosters trust between buyers and HOA boards, ensuring smoother community operations and reducing litigation risks.

Assessment Collection Procedures
Title 11B mandates that HOA assessors send written notices of dues, due dates, and penalties. If unpaid, the HOA may file a civil action, levy a lien, and seek court‑ordered collection. The Act requires timelyex communication and an appeal right for owners.!
Regular Assessments and Payment Obligations
The Maryland Homeowners Association Act (Title 11B) requires each homeowner to pay regular assessments as set forth in the HOA’s governing documents. Assessments are typically scheduled monthly, quarterly, or annually and are calculated from the HOA’s operating budget, reserve contributions, and capital improvement needs. The Act mandates that the HOA provide a written assessment notice to each owner at least 30 days before the due date, detailing the amount, due date, and any applicable late fees. Payment must be made to the HOA’s designated account by check, electronic transfer, or credit card, as authorized by the association. If payment is not received by the due date, a 5 % late fee per month is applied. After 90 days of delinquency, the HOA may initiate collection proceedings, including filing a civil action or placing a lien on the property. Owners receive a written delinquency notice and have 30 days to cure the debt. Owners may pay via ACH, credit card, or check, with the HOA’s payment portal available online. Late fees accrue after 30 days. Interest is capped at. The HOA must provide a yearly statement summarizing all assessments, payments, and any outstanding balance. Owners may request a payment schedule, and the HOA must respond within 10 business days. This transparency helps owners monitor the financial health of the association and ensures that assessments are applied correctly.
Collection Actions and Legal Remedies

The Maryland Homeowners Association Act (Title 11B) empowers associations to enforce assessment payments through a structured collection process. When a homeowner fails to pay within the statutory grace period, the HOA may issue a formal notice of delinquency, specifying the amount due, accrued late fees, and the deadline for cure. If the debt remains unpaid after 30 days, HOA may file to recover and the fees. The court may award a judgment and place a lien on the property, which can be recorded against the title. The lien remains in effect until the debt is satisfied, and the HOA may pursue a foreclosure proceeding if the lien is not cleared. Alternatively, the HOA may seek a summary judgment for the amount owed, expediting the recovery process. Throughout, the HOA must provide the homeowner with written notice of the impending legal action, and the homeowner has the right to contest the claim in court. The Act also requires the HOA to maintain accurate records of all assessments, payments, and collection actions, which are available to homeowners upon request. Compliance with these procedures ensures that the HOA’s legal remedies are enforceable and that homeowners receive fair notice before any court action is taken. Additionally, the Act permits the HOA to suspend a homeowner’s voting rights if delinquency persists, protecting the association’s finances. The HOA may offer a payment plan today. Homeowners may request a payment schedule within 30 days.

Voting and Governance Requirements
The Act mandates that all HOA meetings be conducted in accordance with bylaws, with notices given at least 10 days prior. Voting on matters such as amendments, budgets, and elections requires a quorum of at least 50% of owners. Voting is permitted if approved.

Voting on HOA Matters Prior to Subdivision
Under Maryland Code §11B‑111.7, a homeowners association may only vote on certain matters—such as amendments to covenants, bylaws, or the adoption of a master plan—once all lots have been subdivided and recorded. Until that point, the association is prohibited from making binding decisions that would alter the legal status of the property or the rights of prospective owners. This statutory safeguard ensures that buyers receive a clear, unaltered declaration of the community’s governing documents before they commit to purchase. The Act requires that any proposed vote be accompanied by a written notice, delivered to every lot owner in the subdivision, and that the notice be posted on the association’s website in a PDF format for easy download. The notice must specify the date, time, and location of the meeting, the agenda items, and the quorum requirement. Owners may request a copy of the meeting minutes in PDF form within 30 days of the vote. If a vote is held prematurely, the association may be liable for damages, and the court may order the reversal of the decision. Therefore, compliance with §11B‑111.7 is essential for both legal protection and the integrity of the subdivision process. Additionally, the association must provide a PDF copy of the meeting agenda and any related documents within 15 days of the vote, ensuring owners can review materials in a consistent format. Failure to supply these PDFs may result in a court order to compel disclosure and could invalidate the vote. Owners should verify that PDFs are accessible and meet accessibility standards, as mandated by the Act, to avoid disputes over document integrity. Ensuring compliance. Today. Now. Please.??
Requirements for Holding HOA Meetings
According to Maryland Code §11B‑111.10, an association must provide a written notice in PDF format to all lot owners at least 15 days before a meeting. The notice must include the meeting date, time, location, agenda, quorum requirement, and voting procedures. The agenda must be posted on the association’s website in PDF form and be accessible to all owners. Meeting minutes must be recorded in PDF and distributed within 30 days. The association must maintain a PDF archive of all meeting documents, including agendas, minutes, and any related correspondence, for a minimum of five years. All PDFs must comply with the Maryland Accessibility Act, ensuring that text is selectable and that images have alt text. Failure to meet these PDF requirements can result in a court order to compel disclosure and may invalidate the meeting’s decisions. The association may also use electronic voting, but the electronic record must be stored in PDF format to preserve integrity. Owners can request a copy of any meeting document in PDF at any time. Compliance with these PDF standards protects both the association and its members from legal challenges and ensures transparency in governance. PDFs must also be accessible via screen readers.!! All PDFs must be stored on a secure server with backup copies to prevent data loss and secure data.

Recent Legislative Updates (SB 758 / HB 1534)
Effective Oct1 2025, the bill amends Title 11B to tighten disclosure, require PDF copies of HOA documents, and expand owners’ voting rights. It also clarifies assessment enforcement and meeting notice rules.

Amendments to Title 11B Effective 2025

The 2025 amendments to Title 11B, enacted via SB 758 and HB 1534, introduce pivotal changes that reshape how homeowners associations (HOAs) operate and how buyers receive essential information. First, the law mandates that every HOA provide prospective purchasers with a PDF packet—comprising the declaration, bylaws, financial statements, and a current assessment schedule—at least 30 days before closing.
Second, the amendments clarify assessment collection. HOAs must issue a written notice of any delinquent assessment within 15 days of the due date, followed by a 30‑day grace period before initiating legal action. A mandatory mediation step is created, giving homeowners a chance to settle disputes without court involvement.

Third, voting rights are expanded. Owners holding at least 10% of the total shares in the HOA now have a voting right on any matter that could affect property value, even if bylaws previously limited voting to a higher threshold. This change empowers smaller owners and promotes transparency.
Fourth, meeting notice requirements are tightened. All HOA meetings must be announced in writing at least 10 days in advance, with the notice posted on the association’s website and emailed to all owners in PDF format. The notice must include the agenda, location, and any documents to be discussed.
Finally, the law requires HOAs to maintain an online portal that offers real‑time access to financial reports, meeting minutes, and a searchable archive of all PDFs, ensuring transparency and accountability for at least ten years.
Implications for Homeowners and Associations
The 2025 amendments require HOAs to provide buyers with a PDF packet—assessment schedule—at least 30 days before closing, ensuring transparency reducing disputes; The packet must include the HOA’s governing documents, a copy of the statement, a schedule of all assessments, so buyersunderstand their
For homeowners, the amendments provide clearer insight into how dues are allocated, with mandatory disclosure of reserve balances and projected capital improvements. This transparency empowers owners to hold associations accountable, reducing the risk of mismanagement and ensuring funds are used for maintenance rather than non‑essential projects. Homeowners also gain a structured dispute resolution process, allowing them to negotiate payment plans before legal action, preserving credit scores and preventing liens. Associations must invest in compliant document management systems and staff training to meet new reporting standards. The expanded voting rights encourage broader participation, fostering shared responsibility and potentially leading to more balanced decision‑making. Overall, the 2025 Title 11B amendments aim to create a more transparent, accountable, and resilient homeowners association ecosystem, benefiting both owners and the community for all parties