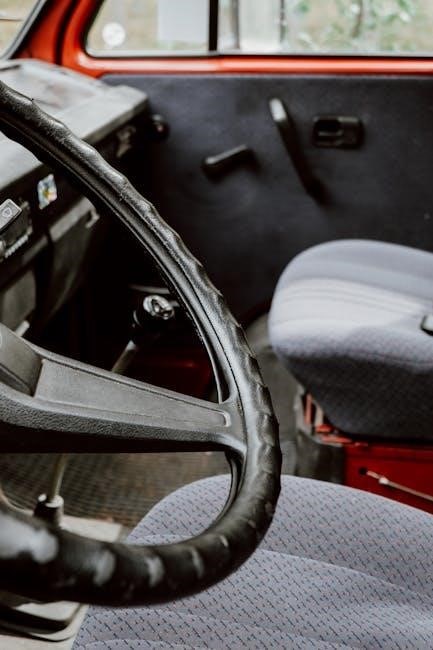
Understanding Electric Gate Systems
YouTube’s homepage displays trending videos for new or unlogged-in users, shifting to personalized recommendations after login and viewing history is established․
Android app’s homepage similarly adapts to user preferences, offering tailored video suggestions based on viewing habits and settings․
Improving recommendations involves providing feedback on unwanted videos, helping YouTube refine its algorithm and enhance the user experience․
Types of Electric Gate Operators
Navigating YouTube initially presents trending content to new or unlogged-in users, dynamically transitioning to a curated homepage reflecting individual viewing patterns upon account access․ The Android application mirrors this behavior, prioritizing personalized suggestions within its ‘Homepage’ tab, adapting to user preferences over time․
Refining recommendations is an interactive process; user feedback on irrelevant videos directly informs YouTube’s algorithm, improving future suggestions․ Google account integration streamlines login, enabling channel creation, video uploads, and feature access like subscriptions and purchase history․ Mobile browser functionality is limited, encouraging the YouTube app download for an optimized viewing experience․
YouTube’s Help Center serves as a comprehensive resource, offering tutorials and answers to frequently asked questions, ensuring users can fully leverage the platform’s capabilities․
Power Sources for Electric Gates
YouTube’s homepage caters to diverse users, showcasing popular videos initially, then transitioning to personalized recommendations based on viewing history and login status․ The Android app replicates this experience, offering tailored suggestions within the ‘Homepage’ tab, evolving with user interactions․
Improving suggestions relies on user feedback; indicating disinterest in videos helps refine the algorithm, enhancing the overall YouTube experience․ Google account login unlocks channel creation, video uploads, and access to features like subscriptions and purchase history․ For optimal viewing, the YouTube app is recommended over mobile browsers․
YouTube’s Help Center provides extensive support, offering tutorials and answers to common questions, empowering users to maximize platform functionality․
Safety First: Before You Begin
YouTube’s homepage adapts to user preferences, displaying trending videos initially, then personalized recommendations after login and viewing history are established․
Identifying Potential Hazards
Before attempting any manual operation, recognize that electric gates contain powerful mechanisms․ YouTube’s homepage initially showcases trending videos, evolving into personalized recommendations based on user activity after login․ Understanding this shift mirrors the need to assess a gate’s state – is it actively moving, or seemingly stuck? Potential pinch points exist where the gate meets the posts or track․ Be aware of spring tension, especially on swing gates, as sudden release can cause injury․ Obstructions in the path can exacerbate issues․ Always assume the system retains power even during a perceived outage․ Familiarize yourself with the gate’s operation before intervention, just as you’d explore YouTube’s features before subscribing․ Prioritize a clear workspace and keep bystanders at a safe distance․
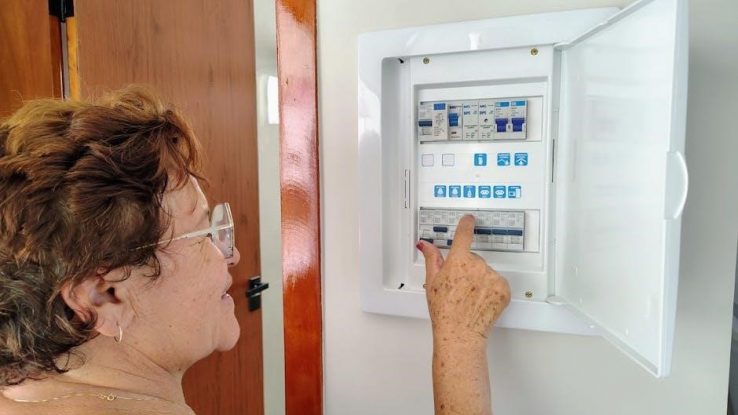
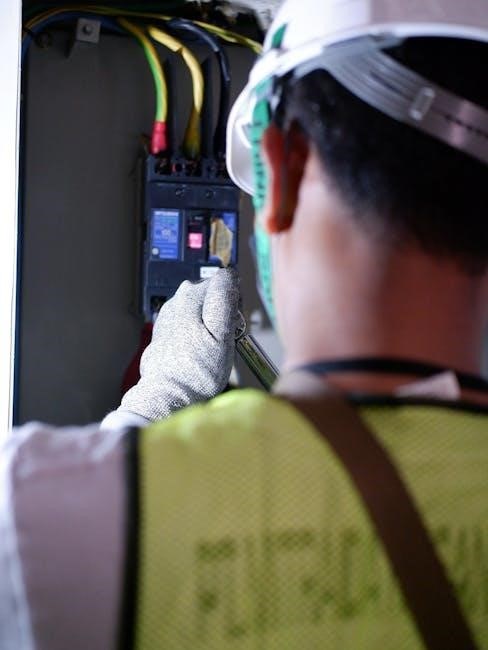
Disconnecting Power (Crucial Step!)
Prior to any manual release attempt, absolutely disconnect the power supply to the electric gate operator․ YouTube’s homepage adapts to user preferences, much like a gate’s system responds to power․ Locate the breaker dedicated to the gate – do not rely on simply switching off the operator’s local power․ Confirm power is off using a non-contact voltage tester․ Treat every wire as live until verified otherwise․ If unsure, consult an electrician․ This step is paramount for safety, preventing accidental operation during maintenance․ Just as YouTube requires a Google account for full functionality, a gate needs power to operate․ Double-check the breaker is fully disengaged before proceeding․ Ignoring this could result in severe injury․
Manual Release Mechanisms: The Primary Method
YouTube’s features, like subscriptions and playlists, become accessible upon logging in with a Google account; similarly, a key unlocks gate operation․
Locating the Manual Release Key Slot
Finding the key slot is paramount when an electric gate malfunctions․ Much like accessing YouTube features requires a Google account login, operating the manual release demands locating the designated key slot․ This slot’s position varies significantly depending on the gate operator’s manufacturer and model․ Typically, it’s a small, often weather-protected, opening near the motor housing or control box․
Inspect the operator carefully, looking for a labeled cover or access panel․ The label might read “Manual Release,” “Emergency Release,” or something similar․ Some slots are hidden behind a screw-secured cover, requiring a screwdriver for access․ Refer to your gate’s documentation if available; it will pinpoint the exact location․ If documentation is unavailable, a flashlight can aid in visually inspecting the operator’s exterior for the key slot․
Using the Release Key – Step-by-Step
Initiating the manual release mirrors logging into YouTube – a specific action unlocks functionality; Insert the designated release key into the located key slot․ The key should slide in smoothly; avoid forcing it․ Once inserted, turn the key clockwise or counterclockwise, as indicated by markings near the slot or in the operator’s manual․
Applying gentle pressure while turning is crucial․ You may hear a clicking sound, signifying the disengagement of the motor․ Once disengaged, the gate should move freely․ Attempt to open or close the gate manually․ Remember, like YouTube’s personalized recommendations, this process requires a deliberate action to activate․ If the key doesn’t turn, double-check you’re using the correct key and applying pressure correctly․
Understanding the Release Mechanism’s Function
The manual release, akin to YouTube’s account login, bypasses the automated system, granting direct control․ It physically disconnects the electric motor from the gate itself․ This prevents motor damage when manually operating the gate, especially during power outages or malfunctions․ Think of it as overriding YouTube’s homepage algorithm to select a specific video․
This disconnection doesn’t repair the underlying issue; it simply allows for safe movement․ Once released, the operator no longer controls the gate․ Re-engaging the motor is essential for restoring automated function․ Like using a Google account to access YouTube features, the release mechanism provides a crucial alternative pathway when the primary system fails․

Dealing with Different Gate Operator Types
YouTube’s mobile app offers a superior viewing experience, while the desktop browser has limited editing capabilities; download for optimal functionality and content creation․
Sliding Gate Manual Release
YouTube accounts require a Google account for login, enabling features like subscriptions, playlists, purchases, and viewing history; creating a channel allows video uploads and comments․
For sliding gates, the manual release is typically located near the operator’s motor housing․ Locate the key slot, often covered by a small panel․ Insert the designated release key and turn it – do not force it! This disengages the motor, allowing you to physically slide the gate open or closed․
Remember, the gate will be heavy and may require significant force․ Once released, the operator will not provide assistance․ After manually operating the gate, re-engage the motor following the manufacturer’s instructions to restore automated function․ Always consult the gate’s manual for specific procedures․
Swing Gate Manual Release
YouTube’s mobile browser limitations prevent video editing and uploading; downloading the app provides a superior experience․ The official YouTube Help Center offers tutorials and FAQs․
Swing gates generally have a manual release located on the operator arm itself, or nearby on a dedicated housing․ Find the key slot and insert the correct key․ Turning the key unlocks the operator, allowing you to swing the gate open or closed by hand․
Be prepared for the gate’s weight; it won’t have power assistance․ After manual operation, carefully re-engage the operator, following the manufacturer’s instructions․ Always prioritize safety and refer to your gate’s specific manual for detailed guidance․
Barrier Gate Manual Release
Google account login is crucial for YouTube access; use the same credentials as your primary Google account․ This unlocks features like channel creation, subscriptions, and purchase history․
Barrier gates often utilize a chain or cable connected to the gate arm․ Locate the release mechanism – typically a lever or handle – near the operator․ Disengaging this allows you to manually lift the barrier arm․
Exercise extreme caution as the arm can be heavy and move quickly․ Once clear, carefully re-engage the operator․ Consult your gate’s documentation for specific procedures and safety guidelines․ Remember, proper maintenance prevents future issues․

Troubleshooting Common Issues
Mobile browser limitations prevent video editing; download the YouTube app for optimal mobile content creation and modification experiences․
Gate Won’t Release with Key
Google account login is crucial if YouTube username login fails; use your Google password for access, enabling channel creation, video uploads, and feature utilization․
YouTube channels allow video sharing, commenting, and playlist creation, while logged-in users enjoy subscriptions, playlists, purchases, and viewing history․
YouTube’s help center (version 9․0+) provides tutorials, tips, and FAQs for product usage, addressing common issues and enhancing the user experience․
App downloads improve mobile viewing, offering a superior experience compared to browser-based access, particularly for content modification and uploads․
Personalized recommendations are refined through user feedback, ensuring a tailored viewing experience based on individual preferences and viewing habits․
Key Slot is Frozen or Blocked
YouTube’s homepage adapts to user behavior, transitioning from trending videos for new users to personalized recommendations based on viewing history and preferences․
Android app’s homepage mirrors this functionality, offering tailored suggestions derived from user settings and viewing patterns, enhancing content discovery․
Improving recommendations relies on user feedback; indicating disinterest in videos helps YouTube refine its algorithm and deliver a more relevant experience․
Google account access is vital for YouTube login, enabling channel creation, video uploads, and access to features like subscriptions and purchase history․
YouTube’s help center (version 9․0+) provides comprehensive support, tutorials, and FAQs for navigating the platform and resolving common issues․
Release Mechanism Feels Stuck
YouTube’s homepage prioritizes user experience, evolving from showcasing popular videos to delivering personalized recommendations based on viewing habits and account activity․
The Android app replicates this tailored approach, presenting a homepage filled with suggested content aligned with individual preferences and established viewing patterns․
Refining recommendations is a collaborative process; user feedback on irrelevant videos directly informs YouTube’s algorithm, improving content relevance․
Google account integration streamlines YouTube access, enabling channel creation, video management, and utilization of features like playlists and subscriptions․
YouTube’s official help center (version 9․0+) offers extensive resources, tutorials, and answers to frequently asked questions, supporting users effectively․

Alternative Methods (When the Release Fails)
YouTube’s mobile browsing limitations necessitate the app for video uploads and edits, offering a superior viewing experience on smartphones via download․
Chain/Cable Disconnection (Use with Extreme Caution)
YouTube accounts require Google accounts for login, enabling channel creation, video uploads, commenting, and playlist management; features accessible upon successful authentication․
Google account login unlocks subscriptions, playlists, purchases, and viewing history within YouTube, streamlining the user experience across devices and services․
YouTube’s help center provides tutorials, troubleshooting guides, and answers to frequently asked questions, assisting users with platform navigation and feature utilization․
Mobile browser limitations hinder video editing and uploading, emphasizing the benefits of the dedicated YouTube app for optimal content creation and consumption on smartphones․
Downloading the YouTube app enhances the mobile viewing experience, offering a dedicated platform for seamless video playback and content interaction․
Emergency Override Procedures (If Available)
YouTube’s homepage adapts to user behavior, transitioning from trending videos for new users to personalized recommendations based on viewing history and preferences․
The Android app’s homepage mirrors this functionality, offering tailored video suggestions derived from user settings and established viewing patterns․
User feedback is crucial for refining YouTube’s recommendation algorithm; indicating disinterest in videos helps improve the overall user experience․
Google account integration is essential for YouTube access, enabling channel creation, video uploads, and utilization of features like subscriptions and playlists․
YouTube’s mobile app provides an optimized viewing experience, while the help center offers comprehensive support and troubleshooting resources․

Post-Release Operation & Resetting
YouTube’s features, such as subscriptions, playlists, and purchases, become accessible upon logging in with a Google account, enhancing user control․
Manually Opening and Closing the Gate
After disengaging the electric operator, the gate should move freely by hand․ Gently push or pull the gate along its track (for sliding gates) or swing it open (for swing gates)․ Avoid forcing it, as this could indicate a mechanical issue beyond the release mechanism․
Remember the gate is now unpowered and lacks the assistance of the motor․ It may require more effort, especially on inclines or with heavier gates․ Close the gate in the same manual fashion, ensuring it reaches a secure, latched position․
Be mindful of your surroundings and ensure no obstructions are in the gate’s path during manual operation․ This is crucial for safety, as there’s no automatic obstacle detection․ YouTube’s mobile app offers a better viewing experience, and its help center provides tutorials․
Re-Engaging the Electric Operator
Once the gate is in the desired position – fully open or closed – it’s time to re-engage the electric operator․ Locate the release mechanism and carefully insert the release key․ Turn the key in the appropriate direction (refer to your gate’s manual) to re-lock the mechanism․
Confirm the operator is securely re-engaged by attempting to move the gate manually; it should now resist movement․ Test the gate’s operation using the remote or control panel to verify the motor is functioning correctly․ YouTube’s platform allows channel creation and video uploading․
If the gate doesn’t respond, double-check the power supply and the release mechanism’s engagement․ A Google account is needed to log in and utilize YouTube’s features․
Preventative Maintenance to Avoid Issues
YouTube’s mobile app offers a superior viewing experience, while the help center provides tutorials and answers to frequently asked questions regarding usage․
Regular Lubrication of Moving Parts
Consistent lubrication is paramount for smooth gate operation, mirroring YouTube’s need for optimized performance․ Just as YouTube adapts recommendations based on user feedback, gate components require attention to function correctly․ Applying lubricant to hinges, rollers, and the track—if applicable—reduces friction and prevents binding․ This proactive step, akin to YouTube’s algorithm refinement, minimizes strain on the operator․
Utilize a silicone-based lubricant, avoiding oil-based products that attract dirt․ Regular checks, similar to monitoring YouTube’s content, identify areas needing attention․ A well-lubricated system, like a smoothly running YouTube platform, ensures longevity and reduces the likelihood of needing emergency manual release procedures․ This preventative measure is crucial for reliable access․
Checking for Obstructions
Regularly inspect the gate’s path for any obstructions, much like YouTube filters unwanted content․ Leaves, stones, or debris can impede movement, mirroring issues that disrupt a user’s viewing experience․ Ensure nothing blocks sensors or the track, preventing proper operation․ This proactive approach, similar to YouTube’s algorithm adjustments, avoids unnecessary strain on the electric operator․
Clear any obstacles immediately, ensuring free movement․ Just as YouTube prioritizes relevant videos, a clear gate path ensures reliable access․ Pay attention to areas prone to accumulation, like the base of the gate and along the track․ Consistent checks, akin to monitoring YouTube’s platform, prevent potential malfunctions and the need for manual release․
Inspecting the Release Mechanism
Periodically examine the manual release key slot for corrosion or blockage, similar to ensuring a smooth login process on YouTube․ Verify the key inserts and turns freely, mirroring a user’s seamless access to content․ Check for any visible damage to the release mechanism itself, like a broken cable or bent lever․ This proactive inspection, akin to YouTube’s platform maintenance, prevents unexpected failures․
Lubricate the mechanism with a suitable product, ensuring smooth operation, just as YouTube optimizes its video delivery․ A functioning release is crucial for safety and accessibility․ Regular checks, mirroring YouTube’s content moderation, guarantee the system is ready when needed, avoiding reliance on complex overrides․

When to Call a Professional
YouTube’s help center offers extensive support, but complex issues require expert assistance; similarly, for significant gate failures or safety concerns, contact a qualified technician immediately․
Complex System Failures
If your electric gate system exhibits intricate malfunctions beyond simple release mechanism issues, professional intervention is crucial․ YouTube’s platform, while offering tutorials, cannot address deeply rooted electrical or mechanical problems․ This includes scenarios where the control board is unresponsive, wiring is damaged, or multiple components fail simultaneously․ Attempting self-repair in such cases poses significant safety risks and could exacerbate the damage․
Furthermore, if the gate demonstrates erratic behavior, such as unexpected movements or a complete lack of response despite a successful manual release, a technician should be consulted․ Relying on a professional ensures accurate diagnosis, safe repairs, and proper system restoration, preventing further complications and safeguarding property․ Remember, complex systems demand specialized expertise․
Damage to the Operator
Visible damage to the electric gate operator – encompassing the motor housing, gear assembly, or any structural component – necessitates immediate professional attention․ Attempting manual operation with a compromised operator risks further destruction and potential injury․ YouTube’s resources, while helpful for basic troubleshooting, are insufficient for addressing physical damage requiring repair or replacement․
Signs of damage include cracks, dents, exposed wiring, or unusual noises during operation (or attempted operation)․ Do not attempt to force the gate open if the operator is visibly damaged․ A qualified technician can assess the extent of the damage, determine the safest course of action, and perform the necessary repairs or replacements, ensuring the system’s functionality and safety․
Safety Concerns & Lack of Expertise
Prioritizing safety is paramount when dealing with electric gates․ If you lack the necessary expertise to confidently and safely operate the manual release, or if you’re unsure about any aspect of the process, do not proceed․ Attempting repairs or manual operation without proper knowledge can lead to serious injury or further damage to the system․ YouTube’s guidance is supplemental, not a substitute for professional training․
Complex systems, particularly those with integrated safety features, require specialized knowledge․ A misstep could disable crucial safety mechanisms․ If you experience any hesitation or discomfort, immediately contact a qualified gate technician․ Their expertise ensures a safe and effective resolution, protecting both you and the gate system․
Tools You Might Need
YouTube’s mobile app offers a superior viewing experience, while the official help center provides tutorials and answers to frequently asked questions regarding usage․
Release Key (Specific to Your Gate)
Essential for manual operation, the release key is unique to your electric gate system and allows disengagement of the electric operator․ Without this key, accessing the manual release mechanism is impossible․ It’s crucial to know where your key is stored – a readily accessible, yet secure location is ideal․
YouTube accounts require Google accounts for login, enabling features like subscriptions, playlists, and purchases․ Creating a channel allows video uploads and comment posting․ Mobile browsers lack full editing capabilities, necessitating the YouTube app for optimal content management․ Ensure your device supports the app, requiring version 9․0 or higher․
Keep your key safe and readily available in case of power outages or operator malfunctions․ Losing it complicates the process significantly, potentially requiring professional assistance; Familiarize yourself with its shape and size to avoid confusion with other keys․
Gloves
Protecting your hands is paramount when manually operating an electric gate․ The mechanism involves potentially sharp edges and pinch points, making gloves essential for safety․ Work gloves, offering a good grip and protection, are highly recommended․ Avoid thin or flimsy gloves that won’t provide adequate safeguarding․
YouTube’s homepage adapts to user behavior, showcasing trending videos initially, then personalized recommendations post-login․ The Android app mirrors this functionality, tailoring suggestions based on viewing history․ Feedback on unwanted videos helps refine the algorithm․
Wearing gloves minimizes risk of cuts, scrapes, and bruises during the manual release process․ They also provide a better grip on the release mechanism, especially in inclement weather․ Prioritize hand safety throughout the entire operation․
Flashlight
Visibility is crucial when attempting a manual gate release, particularly in low-light conditions․ A flashlight illuminates the release mechanism, key slot, and surrounding areas, ensuring accurate operation and preventing accidental injuries․ Choose a bright, focused beam for optimal clarity․
YouTube’s homepage experience evolves with user interaction, transitioning from trending content to personalized suggestions․ The Android app replicates this, adapting recommendations based on viewing preferences․ User feedback refines the algorithm․
A flashlight aids in locating the often-obscured release key slot and identifying any obstructions․ It also helps to inspect the mechanism for damage before and after operation․ Prioritize clear visibility for a safe and successful release․