Welcome to the Yardworks 42 Lawn Tractor Manual! This guide provides essential information for safe operation‚ maintenance‚ and troubleshooting of your lawn tractor. Designed to help you maximize efficiency and performance‚ it covers key features‚ assembly‚ and best practices for optimal use. Ensure you read this manual carefully before operating the tractor to guarantee safety and longevity.
1.1 Overview of the Yardworks 42 Lawn Tractor
The Yardworks 42 Lawn Tractor is a versatile and powerful tool designed for efficient lawn maintenance. Equipped with a robust engine and smooth transmission‚ it offers excellent performance for cutting and managing various terrain types. The tractor features a 42-inch mowing deck‚ providing a wide cutting swath for faster results. Its ergonomic design ensures comfort during extended use‚ while the hydrostatic transmission allows for seamless speed control. Built with durability in mind‚ this tractor is ideal for homeowners seeking a reliable solution for maintaining larger lawns. With its user-friendly interface and advanced features‚ the Yardworks 42 Lawn Tractor balances power and precision‚ making it a great choice for achieving a perfectly manicured lawn.
1.2 Purpose and Scope of the Manual
This manual serves as a comprehensive guide for the Yardworks 42 Lawn Tractor‚ providing detailed instructions to ensure safe and effective operation. Its purpose is to familiarize users with the tractor’s features‚ assembly‚ maintenance‚ and troubleshooting procedures. The scope includes step-by-step instructions for assembly‚ operation‚ and maintenance‚ as well as safety precautions to prevent accidents. It is designed for both new and experienced users‚ offering a thorough understanding of the tractor’s capabilities and optimal usage. By following this manual‚ users can maximize the tractor’s performance‚ extend its lifespan‚ and maintain a well-groomed lawn efficiently. Adherence to the guidelines provided is essential for ensuring safety and achieving the best results with your Yardworks 42 Lawn Tractor.
Key Features of the Yardworks 42 Lawn Tractor
The Yardworks 42 Lawn Tractor boasts a powerful 22 HP engine‚ smooth hydrostatic transmission‚ and a 42-inch cutting deck. It features mulching capability‚ adjustable height settings‚ and a sturdy steel frame for durability and precision mowing.
2.1 Engine and Transmission Specifications
The Yardworks 42 Lawn Tractor is equipped with a robust 22 HP V-twin engine‚ designed for reliable power and efficiency. The engine features a overhead valve (OHV) design‚ which enhances fuel efficiency and reduces operational noise. Paired with a smooth hydrostatic transmission‚ the tractor offers seamless speed control‚ allowing for effortless mowing on various terrain types. The transmission system provides infinite forward and reverse speeds‚ enabling precise maneuverability and adaptability to different cutting conditions. With a generous fuel tank capacity‚ the tractor ensures extended mowing sessions without frequent refills. The combination of a powerful engine and advanced transmission system makes the Yardworks 42 ideal for maintaining large lawns with ease and precision.
2.2 Mowing Deck and Cutting Options
The Yardworks 42 Lawn Tractor features a durable 42-inch steel mowing deck‚ designed for efficient cutting and long-lasting performance. The deck is equipped with three cutting blades‚ ensuring an even cut across your lawn. Adjustable cutting heights‚ ranging from 1.5 to 4 inches‚ allow for customizable mowing to suit different grass types and preferences. The deck also includes a washout port for easy cleaning‚ preventing grass clippings from accumulating and maintaining optimal performance. Additionally‚ the tractor offers versatile discharge options‚ including side discharge‚ mulching‚ and bagging capabilities‚ giving you flexibility in how you manage grass clippings. These features make the Yardworks 42 ideal for maintaining a pristine lawn with minimal effort and maximum efficiency.
2.3 Steering and Maneuverability
The Yardworks 42 Lawn Tractor is designed with ease of handling in mind‚ featuring a robust steering system for precise control. Its power steering option reduces fatigue‚ making sharp turns and navigating around obstacles effortless. The tractor’s compact design and tight turning radius allow for seamless maneuverability in tight spaces‚ such as between trees or garden beds. The hydrostatic transmission ensures smooth acceleration and deceleration‚ enhancing overall control. Large‚ durable wheels provide stability on various terrains‚ including uneven or sloped areas. These features collectively make the Yardworks 42 highly adaptable for lawns of all shapes and sizes‚ ensuring efficient mowing even in challenging landscapes. The tractor’s responsive steering and balanced design contribute to a comfortable and productive mowing experience.
Safety Precautions and Guidelines
Welcome to the safety section of the Yardworks 42 Lawn Tractor Manual. This chapter outlines essential precautions to ensure safe operation‚ covering hazard avoidance‚ protective gear‚ and emergency procedures. Always prioritize safety to prevent accidents and maintain equipment longevity.
3.1 General Safety Tips for Operating the Tractor
Always wear protective gear‚ including gloves‚ safety glasses‚ and sturdy footwear. Ensure the area is clear of obstacles‚ children‚ and pets before mowing. Never operate the tractor on steep slopes or unstable terrain. Keep loose clothing tied back and avoid jewelry that could get caught in moving parts. Familiarize yourself with controls and start the engine only when seated. Maintain a firm grip on the steering wheel and avoid sharp turns. Never leave the tractor unattended while it’s running. Be cautious of uneven ground and hidden objects like rocks or wires. Follow recommended mowing patterns and adjust speed according to terrain. Keep the tractor in neutral when starting and use the rollover protection system (ROPS) if equipped. Regularly inspect the machine for damage or wear. Follow all safety guidelines to ensure a safe and efficient mowing experience.
3.2 Protective Gear and Apparel
Always wear appropriate protective gear when operating the Yardworks 42 Lawn Tractor to minimize injury risks. A helmet or hard hat is essential to protect your head from potential impacts. Wear safety glasses or goggles to shield your eyes from debris and grass clippings. Gloves improve grip and protect your hands from blisters and cuts. Sturdy‚ closed-toe footwear‚ such as steel-toe boots‚ is recommended to prevent foot injuries. Avoid loose clothing or jewelry that could get caught in moving parts. Ensure long hair is tied back to prevent entanglement. Use hearing protection if operating the tractor in noisy environments. Proper apparel and gear are critical for safe and comfortable operation.

Assembly and Installation Instructions
This section provides step-by-step guidance for assembling and installing your Yardworks 42 Lawn Tractor‚ including unboxing‚ attaching parts‚ and initial setup to ensure proper functionality.
4.1 Unboxing and Inventory of Parts
Begin by carefully unboxing the Yardworks 42 Lawn Tractor and verifying all components against the provided parts list. Ensure the tractor frame‚ mowing deck‚ seat‚ and steering wheel are included. Check for accessories like keys‚ manuals‚ and hardware. Inspect each part for damage or defects. Organize the components to ensure a smooth assembly process. Compare the inventory with the manual’s parts list to confirm completeness. Missing or damaged items should be reported to the supplier immediately to avoid assembly delays. Properly sorting and preparing the parts will streamline the setup process and ensure all pieces are accounted for before proceeding.
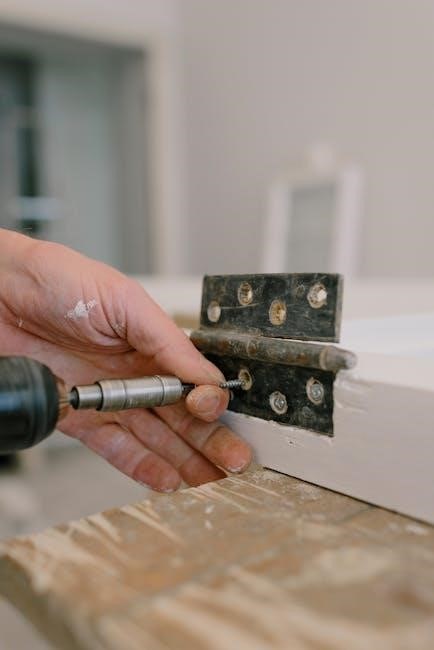
4.2 Attaching the Mowing Deck
To attach the mowing deck‚ position the Yardworks 42 Lawn Tractor on a level surface and ensure the deck is aligned with the tractor’s frame. Locate the deck attachment points and secure them using the provided hardware. Tighten the bolts firmly to ensure stability. Connect the deck lift linkage and ensure it operates smoothly. Check the deck’s alignment with the tractor’s wheels for even cutting. Refer to the manual for specific torque specifications. Once attached‚ lower the deck to the lowest setting and test the engagement lever to ensure proper function. Always double-check the deck’s alignment and height settings before mowing to achieve optimal results.
4.3 Initial Setup and Adjustments
After attaching the mowing deck‚ proceed with the initial setup and adjustments. Begin by ensuring the tractor is on a level surface. Adjust the seat to a comfortable position for optimal control. Check the steering alignment and ensure the wheels are straight. Inflate the tires to the recommended pressure‚ as specified in the manual. Adjust the throttle and choke settings to ensure smooth engine operation. Test the brakes and ensure they function properly. Fine-tune the mowing deck height adjustment to your desired cutting level. Refer to the manual for specific torque values for bolts and fasteners. Finally‚ test all controls and functions to ensure everything operates correctly before first use.

Operating the Yardworks 42 Lawn Tractor
Operate the tractor safely by following guidelines‚ ensuring the area is clear of obstacles. Use smooth turns and appropriate gear for terrain. Always maintain control and visibility.
5.1 Starting and Stopping the Engine
Before starting‚ ensure the parking brake is engaged and the mowing deck is disengaged. Locate the ignition switch‚ typically on the dashboard‚ and turn it to the “start” position. Allow the engine to warm up briefly before moving. To stop‚ slow the tractor to a complete halt‚ engage the parking brake‚ and turn the ignition to the “off” position. Avoid sudden stops or leaving the engine idling for extended periods. Always refer to the manual for specific starting and stopping procedures to ensure safe operation. Proper engine management helps maintain performance and longevity of the tractor. Follow these steps consistently for optimal results.
5.2 Basic Controls and Functions
Familiarize yourself with the Yardworks 42 Lawn Tractor’s controls to ensure smooth operation. The ignition switch‚ located on the dashboard‚ powers the tractor. The throttle lever adjusts engine speed‚ while the steering wheel provides directional control. The forward and reverse pedals manage movement and speed. The mowing deck engagement lever‚ often located on the right side‚ activates the cutting blades. Use the parking brake to secure the tractor when stationary. Adjustments for seat position and steering wheel height are available for comfort. Understanding these controls is essential for safe and efficient mowing. Always refer to the manual for specific details on control locations and functions‚ as they may vary slightly depending on the model. Proper use of these controls enhances overall performance and safety.
5.3 Driving Tips for Different Terrain
Adapt your driving technique to match the terrain for optimal performance. On flat surfaces‚ maintain steady speed and use the throttle wisely. When navigating slopes‚ reduce speed and avoid sharp turns to prevent tipping. For uneven ground‚ engage a lower gear and proceed cautiously to maintain traction. Tight spaces require slow‚ deliberate movements‚ using the steering wheel and pedals precisely. Wet or muddy areas demand extra care to avoid skidding; reduce speed and allow more stopping distance. Always keep the mowing deck engaged at the proper height to maintain stability. Clear debris before mowing to prevent damage or obstruction. By adjusting your driving style to the terrain‚ you ensure safety and efficiency while mowing. Proper terrain-specific techniques enhance both performance and tractor longevity.

Mowing Techniques and Best Practices
Regular maintenance ensures smooth operation. Maintain consistent mowing patterns and adjust heights for grass types. Sharpen blades regularly for clean cuts. Alternate mowing directions to prevent soil compaction.
6.1 Optimal Mowing Heights and Patterns
For the Yardworks 42 Lawn Tractor‚ maintaining the correct mowing height is essential for a healthy lawn. Adjust the deck to 2.5–3 inches for most grass types‚ ensuring even cutting. Avoid cutting more than one-third of the grass blade to prevent stress. Alternate mowing patterns to promote uniform growth and prevent soil compaction. For larger areas‚ use overlapping passes to cover the entire lawn efficiently. Leave grass clippings on the lawn to act as a natural fertilizer‚ unless bagging. Regularly check for debris to avoid damage to the mower or lawn. Proper mowing techniques enhance lawn appearance and longevity while optimizing tractor performance.
6.2 Handling Obstacles and Tight Spaces
Navigating around obstacles and tight spaces with the Yardworks 42 Lawn Tractor requires careful planning and precision. To handle obstacles like trees or gardens‚ slow down and use the tractor’s compact turning radius to maneuver effectively. For tight spaces‚ consider raising the mowing deck and using the tractor’s reverse mode to improve visibility. Avoid sudden turns and use the steering wheel’s responsive controls to guide the tractor accurately. When approaching narrow areas‚ reduce speed and ensure the mowing deck is properly aligned to prevent damage. Utilize the tractor’s adjustable features to adapt to varying terrain and obstacles‚ ensuring efficient mowing even in challenging conditions.
6.3 Mulching and Bagging Options
The Yardworks 42 Lawn Tractor offers versatile mulching and bagging options‚ enhancing your mowing experience. For mulching‚ leave the grass clippings on the lawn to act as a nutrient-rich fertilizer. To switch to bagging‚ attach the provided grass catcher and ensure it’s securely fastened. Use the height adjustment lever to optimize cutting for either mode. For mulching‚ a lower mowing height is recommended‚ while bagging works best with higher settings. Always use the correct blade type for mulching to ensure fine clippings. Regularly empty the bag and clean the chute to maintain efficiency. These options allow you to customize your lawn care routine based on your preference and lawn type.
Maintenance and Servicing Schedule
Regular maintenance ensures optimal performance and longevity. Schedule oil changes every 50 hours‚ blade sharpening annually‚ and tire pressure checks monthly. Clean the air filter regularly.
7.1 Regular Servicing Intervals
Regular servicing is essential to maintain the performance and longevity of your Yardworks 42 Lawn Tractor. Follow a structured schedule to ensure all components remain in optimal condition. Check and adjust tire pressure monthly‚ as specified in the manual. Change the engine oil every 50 hours of operation to prevent wear and tear. Clean or replace the air filter every 25 hours to ensure proper airflow. Sharpen the mower blades annually or as needed to maintain cutting efficiency. Lubricate moving parts‚ such as wheel bearings and pivot points‚ every 30 hours. Inspect belts and hoses for signs of wear and replace them if necessary. Adhering to these intervals ensures reliable operation and extends the lifespan of your tractor.
7.2 Oil Change and Lubrication
Regular oil changes and proper lubrication are crucial for maintaining the Yardworks 42 Lawn Tractor’s engine and moving parts. Check the manual for the recommended oil type and capacity. Drain the old oil into a pan and dispose of it responsibly. Refill with fresh oil‚ ensuring the level matches the dipstick’s indication. Lubricate pivot points‚ wheel bearings‚ and other moving parts with high-quality grease. Apply lubricant every 30 hours of use or as specified. Refer to the manual for exact locations and quantities. Proper lubrication prevents friction damage and ensures smooth operation. Always use the correct grease type to avoid compromising component durability. Regular maintenance keeps your tractor running efficiently and extends its service life.
7.3 Blade Maintenance and Sharpening
Proper blade maintenance is essential for optimal mowing performance and longevity. Inspect the mower blade regularly for signs of wear‚ damage‚ or bent edges. Dull or damaged blades can tear grass‚ leaving uneven cuts and promoting disease; Sharpen the blade using a grinder or file‚ maintaining the original angle to ensure proper cutting efficiency. Clean the blade thoroughly before sharpening to remove dirt and debris. After sharpening‚ balance the blade to prevent vibration during operation. Replace blades if they are severely damaged or corroded. Always wear gloves and eye protection when handling sharp objects. Sharpening should be done every 20-30 hours of use or as needed. Proper blade care ensures a clean‚ even cut and prolongs the life of your Yardworks 42 Lawn Tractor.
7.4 Tire Pressure and Wheel Alignment
Proper tire pressure and wheel alignment are crucial for the stability‚ maneuverability‚ and overall performance of the Yardworks 42 Lawn Tractor. Check tire pressure monthly and before extended use‚ ensuring it matches the manufacturer’s recommendations‚ which can be found in the manual or on the tire sidewall. Underinflated tires can lead to uneven wear and reduced traction‚ while overinflated tires may compromise stability. For wheel alignment‚ inspect the tractor’s movement by driving straight on a flat surface. If it pulls to one side‚ adjust the front wheels or consult a professional. Proper alignment ensures even tire wear and precise control. Maintain correct tire pressure and alignment to maximize efficiency and safety while operating your Yardworks 42 Lawn Tractor.

Troubleshooting Common Issues
Identify and resolve issues promptly to ensure optimal performance. Common problems include engine startup failures‚ uneven cutting‚ and poor maneuverability. Refer to specific sub-sections for detailed solutions.
8.1 Engine Not Starting or Running Roughly
If the engine fails to start or runs unevenly‚ check the fuel level and quality. Ensure the fuel cap is venting properly and the air filter is clean; Verify the spark plug is securely connected and not worn out. Old or stale fuel can cause issues; drain and refill with fresh gasoline. If the problem persists‚ inspect the ignition coil or consult a professional. For rough running‚ check the oil level and viscosity‚ as improper levels can disrupt engine performance. Ensure the choke is functioning correctly and the throttle is set appropriately. If issues remain‚ refer to the troubleshooting guide or contact customer support for assistance.
8.2 Mowing Deck Issues and Adjustments
If the mowing deck fails to lower or raise‚ check the lift linkage for damage or obstructions. Ensure the deck belt is properly tensioned and not worn. For uneven cutting‚ verify the deck is level—adjust the height adjustment nuts if necessary; Clean the deck regularly to prevent grass clippings from buildup‚ which can affect performance. If the blades are dull‚ sharpen or replace them. Lubricate pivot points periodically to maintain smooth operation. For vibration issues‚ balance the blades and ensure they are securely attached. Always refer to the maintenance schedule for routine deck inspections and adjustments to ensure optimal mowing results.

Warranty and Customer Support
The Yardworks 42 Lawn Tractor is backed by a limited warranty covering defects in materials and workmanship for a specified period. Contact customer support via phone‚ email‚ or the official website for assistance with warranty claims‚ troubleshooting‚ or general inquiries. A dedicated support team ensures prompt resolution of issues‚ enhancing your ownership experience.
9.1 Warranty Coverage and Conditions
The Yardworks 42 Lawn Tractor is covered by a limited warranty that protects against defects in materials and workmanship for a specified period from the date of purchase. The warranty applies to the original purchaser and is non-transferable. Coverage includes repairs or replacements of faulty components at no additional cost‚ provided the tractor has been used and maintained in accordance with the manufacturer’s instructions. Certain conditions‚ such as misuse‚ accidental damage‚ or failure to perform routine maintenance‚ may void the warranty. For full details‚ including warranty duration and exclusions‚ refer to the official Yardworks website or contact their customer support team. Proper documentation‚ such as a purchase receipt‚ is required to process warranty claims.

Environmental Considerations
The Yardworks 42 Lawn Tractor is designed with eco-friendly features to minimize environmental impact‚ including efficient fuel consumption and recyclable components‚ promoting sustainable lawn care practices.
10.1 Eco-Friendly Features of the Tractor
The Yardworks 42 Lawn Tractor is designed with eco-friendly features to minimize its environmental impact. It includes a fuel-efficient engine that reduces emissions and lowers fuel consumption. The tractor also incorporates recyclable materials in its construction‚ promoting sustainability and reducing waste. Additionally‚ the energy-efficient design optimizes performance while using less fuel‚ further decreasing its carbon footprint. The tractor’s mulching capability allows grass clippings to be returned to the soil‚ reducing the need for chemical fertilizers and supporting healthier lawn growth. These features make the Yardworks 42 Lawn Tractor a more environmentally responsible choice for lawn care‚ aligning with modern sustainability goals and practices.
The Yardworks 42 Lawn Tractor Manual provides comprehensive guidance‚ ensuring ease of use‚ optimal performance‚ and eco-friendly benefits for a superior mowing experience.
11.1 Final Tips for Optimal Performance
To maximize your experience with the Yardworks 42 Lawn Tractor‚ maintain regular servicing schedules‚ store it properly‚ and use high-quality fuel and blades. Adjust mowing patterns based on grass type and terrain for even results. Keep the mowing deck clean to prevent clogging and ensure precise cuts. Always follow safety guidelines to protect yourself and others. By adhering to these tips‚ you’ll extend the tractor’s lifespan‚ enhance efficiency‚ and enjoy a pristine lawn. Remember‚ consistent maintenance and mindful operation are key to unlocking the tractor’s full potential while minimizing environmental impact.